
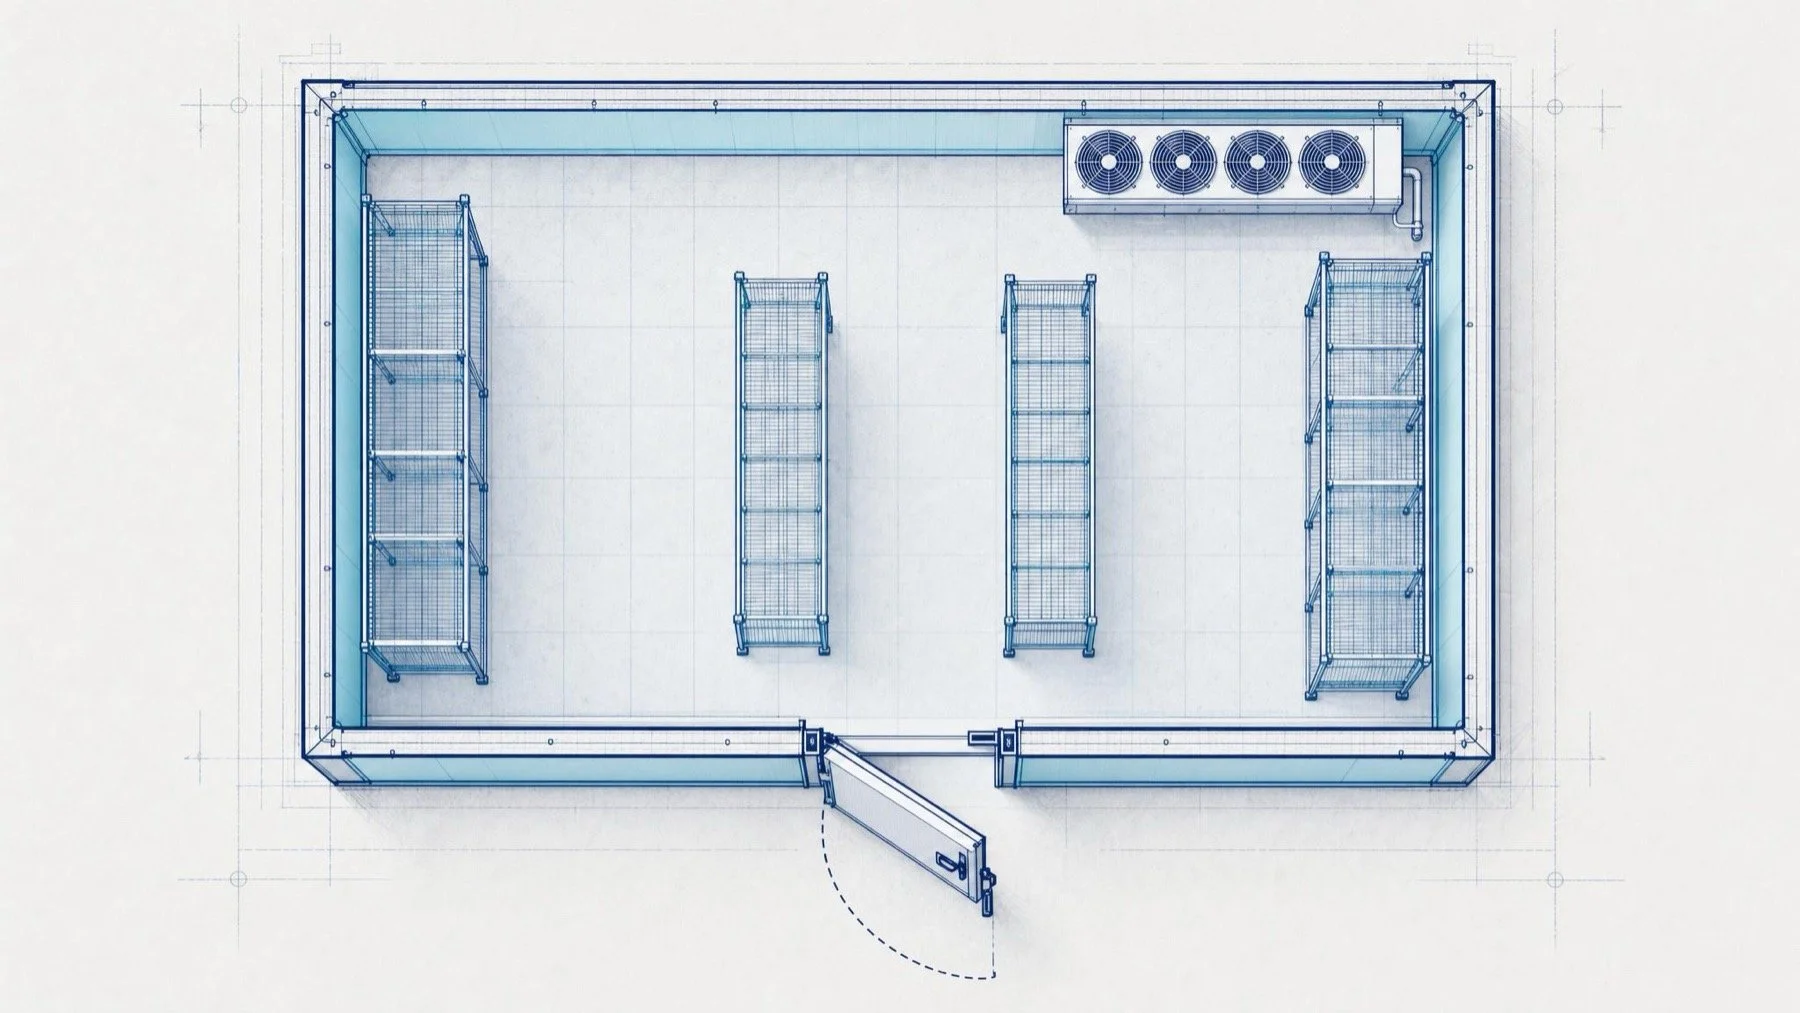
Many costly cold room design mistakes are made before anyone talks about refrigeration. A room drawn to fit a leftover corner, with the door wherever the wall allowed, can be too small on the busiest delivery day or too awkward to stock quickly, and those problems are expensive to fix once the panels are standing. Good cold room design follows the order the building forces on you. Settle the product and its daily movement first, then the envelope, then where the heat goes, then the layout inside. The result is a brief that a builder can price and that you can compare between suppliers.
Start with the product and the day it arrives
Every other decision depends on what goes into the room and how it moves. List each product group, the temperature it needs and how long it stays. Then describe the busiest day rather than an average one: when deliveries arrive, how they come in (cases on a hand truck, roll in carts or pallets), how many times the door opens during service, and what leaves the room and when. A café restocking twice a week and a commissary receiving every morning can need the same floor area and very different rooms.
NRCan guidance tells buyers to consider the configuration of doors required for access and display before choosing equipment. In practice that question is answered by the product flow. A room that receives pallets needs a door, threshold and floor built for them. A room that feeds a service line needs the door where staff actually come from. If you are holding more than one temperature, decide now whether a single room, a divided room or a cooler and freezer combination fits the flow better.
The envelope choices that are hard to change later
The envelope is the panels, floor, door and ceiling that separate cold product from the building. These are the parts that cost the most to change after installation, so they deserve the most attention at the drawing stage. Our cooler builds use a foamed in place polyurethane core with a cam lock joint system. Our article on panel and insulation choices explains how thickness and joints affect a room over its working life.
The floor is the next decision. A cooler can often sit on a sound existing slab, while a freezer generally needs an insulated floor and protection against the ground below freezing. Ask early whether carts or pallet jacks will roll in, because that sets the floor build and the threshold. The walk in cooler floor guide covers the options in more detail.
Then the door. Its width should suit the largest load that goes through it, its swing should not block the aisle outside, and its position decides where the first shelf can start. Our article on door size, swing and hardware walks through those choices. Finally, check the ceiling height and what sits above the room. The coil, lights and any refrigeration lines need space, and a low ceiling can limit the panel height you can use.
Where the heat goes once the room is running
Every cold room moves heat out of the box and releases it somewhere else. Where that somewhere is changes noise, kitchen comfort and service access. Remote outdoor condensing units can free up indoor space and shed heat outside where it belongs. For year round outdoor duty, we install low ambient units that run through Ontario winters. A self contained unit on top of the box can suit a small room where a remote location is impractical, and our comparison of remote and self contained systems sets out the trade offs.
Two utilities follow from that choice. The room needs the right electrical supply for its refrigeration, lights and heaters, and the coil needs a drain line with somewhere to go. Both are much easier to plan on paper than to retrofit. Our guides to electrical requirements and drainage and condensate list what to confirm with your electrician and plumber before the room arrives.
Layout inside the box
Usable capacity is the product staff can see, reach and rotate, which is less than the volume inside the panels. Shelving depth, aisle width and where the coil hangs all compete for the same space. Air from the coil has to travel across the room and return, so stock packed tight to the ceiling or against the coil face can leave corners warmer than the display suggests. Plan the shelving with the airflow in mind, and keep the fastest moving stock nearest the door so the door spends less time open. The shelving and aisle planning guide goes further on spacing.
Think about cleaning and inspection too. Fixed shelving that sits on the floor makes washing the floor harder, and a coil above a high shelf can be hard to service without unloading the shelf. Small layout decisions like these decide how the room behaves after a few years of daily use, not only on handover day.
A design brief a builder can price
A clear brief lets two suppliers price the same room. It does not need engineering drawings. It needs facts about your operation and your site. Include the following:
- A measured sketch of the space, with ceiling height, door openings and obstructions marked.
- Each product group with its target temperature, peak quantity and how long it stays in the room.
- Delivery and service patterns for the busiest day, including how the stock is moved.
- Where a condensing unit could go, indoors, on the roof or outside, and how far that is from the room.
- The available electrical supply and the nearest drain.
- Any access limits such as stairs, narrow corridors, landlord rules or hours when work is allowed.
Our design stage covers panel layout, refrigeration load, door placement and the shelving plan. The quote that follows specifies every component. If you are earlier in the process, our checklist of what to gather before requesting a quote can help you assemble the brief.
Operator's refrigeration decision: lock the expensive choices first
If you only have time to get a few decisions right, make them the ones that are hardest to undo: the footprint, the floor, the door position and where the heat goes. Shelving, lighting and controls matter, but they can be adjusted later. The envelope and the refrigeration route usually cannot be changed without taking the room out of service. Our custom walk in coolers for Toronto operators are designed around the space you have rather than a catalogue size. Beyond Toronto, we cover Mississauga, Brampton, Vaughan, Markham, Oakville, Burlington, Hamilton and Barrie. Operators west of the city can also start from our Mississauga walk in cooler page.